Nail Art

Paraffin Manicure

Learn the Essential Benefits of Paraffin Manicure

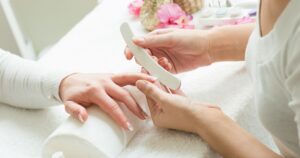
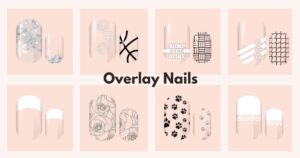
Paraffin manicure is a popular obsession of people who are skin care enthusiasts. Paraffin is a natural substance with a lot of health benefits. It contains hydrocarbons like hexane, heptanes and octane that make your skin soft and smooth when applied as a coat. The manicure involves dipping your nails into hot wax to make your skin soft and nail clean. It also enhances blood circulation and alleviates pain. The following blog would discuss the benefits of paraffin manicure, application process and related essential things that you must keep in mind.  How Paraffin Manicure Works? Paraffin is a wax that is applied as a coat to soften your skin and make your nails clean. The unheated wax can be applied to your arms and hand. After some time the wax is removed gently with a hot towel. The essential components of the wax allow you to experience a rejuvenating experience. Incorporating paraffin manicure in your weekly skin-care routine would allow you to achieve the ultimate benefit of wax manicure.  Essential Steps of Paraffin Manicure Following proper steps of paraffin manicure is essential to experience a perfect result. Here are the useful steps that you must follow. Benefits of Paraffin Manicure Paraffin contains hydrocarbons that provide natural nourishment to your skin and nails. It softens your skin and makes your nails glossy and shiny. The moisture from the wax prevents and heals hangnails and protects the cuticles. On the other hand, oil from the paraffin wax reduces pain and promotes circulation and keeps your nails and cuticles from bacteria. Finishing off the paraffin manicure treatment with nail polish wraps or gel nail stickers keep your nails protected and enhance their aesthetic appeal.    Precautionary Measures Before getting a paraffin manicure you must follow some safety measures to prevent burning your hand and for other precautions. Endnotes Hopefully the above information regarding paraffin manicure proves useful for you. Make sure you follow the right steps in an orderly manner to maximize the effect of the manicure. More importantly, paraffin manicure involves a lot of risk factors of getting burned. Be extra cautious to avoid any accidents. After the procedure you can apply nail polish wrap or gel nail stickers for extra protection.

Read More »
Home Manicure

Essential Steps to Follow for a Perfect Home Manicure

Manicure is an essential nail care routine that keeps your nails healthy and beautiful. Especially, for working women who are exposed to heat and dust daily, getting a weekly manicure is beneficial. However, visiting a salon once a week is a costly investment. Instead we encourage you to indulge in a DIY method of manicure at home. Moreover, incorporating manicure in your daily skin care routine is more effective than visiting the salon occasionally. Keep reading to learn about the important steps of home manicure.  Achieve Salon like Nails by following the Key Steps Following proper procedures of home manicure is extremely essential to achieve a perfect salon-like nail manicure. Improper application would not only destroy the manicure but can also damage your nail texture and color. Make sure that your nails are in good shape and smooth by following the essential steps. 1. Clean the Nails Removing the existing nail polish is the first step of a home manicure. Use non-alcoholic nail polish remover and cotton pad to remove the nail polish properly. Any amount of remaining nail polish can affect the application of new nail wraps. Wash your hand properly after applying remover. 2. Shape the Nails After removing the existing nail polish the second step is clipping and filing nails. You must cut your nails at a length and shape that is comfortable for you. It is recommended to maintain a short-length for your nails as it prevents breakage and cracks. Moreover, short nails are esthetically pleasing with a clean appearance. Make sure to wash your hands after nail trimming.  3. Apply Cuticle Oil  Cuticle oil nourishes the cuticles and your nails. Take a few drops of it on a brush or and dab it for 3 to 5 minutes. Massage the cuticle oil in a circular motion and move from the base of the nails towards tips of the nail. This massage process makes your nail stronger and facilitates faster nail growth.   4. Salt Water Soaking After clipping and shaping your nail you must clean it to remove dead skin and dirt from your nails. Soak your nails in fresh water with a pinch of epsom salt and keep it for 5 to 10 minutes. Salt water also softens your nails and reduces swelling if any due to ingrown nails. However, in case of dry manicure instead of soaking in salt water a lotion is used to make your skin smooth and glowing.  5. Removing Dead Skin  Salt water soaking makes it easier for you to remove dead skin. Use soft scrub for your hand and gently rub it to remove dead skins, polish your hand knuckles and remove the tans. The skin around your nails becomes smoother and clean in this step. 6. Apply Moisturizer Applying moisturizer is the essential step after removing dead skins as your skin becomes rough due to exfoliation. Massaging with moisturizer for 10 minutes helps to improve circulation and nourishes your skin. Make sure that you don’t skip this step. You can use body butter or other hand cream that suits your skin the most.  7. Design your Nails with Nail Polish Wraps After all the preparation steps now it’s time to beautify your nails with your chosen nail polish wraps. Apply a protective base coat to create a strong foundation for the nail wraps. Wait for 3-5 minutes to let it dry up.  Then apply a gel nail wrap of your choice or you can experiment with the colors as you like. However, make sure that the nail polish wraps are attached perfectly with your nails and trim off the excess nail wraps that might be hanging out of your nails. Lastly, apply a final coat to provide added protection to the wraps.  Conclusion The article has discussed all the essential steps of a perfect home manicure. Hope all this guide proves useful for you. Home manicure offers better results as a single parlor manicure does not last for long. Practicing DIY methods at home weekly allows you to achieve and maintain healthy and shiny nails and hand appearance.

Read More »
Overlay Nails Wraps

What Is Overlay Nails? Make Your Nails Healthier

Looking beautiful is not all about wearing branded clothes. It is about embracing the grooming ideas that make you look smarter and more happening. This is why manicure is important for women. When it comes to manicures, women choose various types of products and designs to express their style statements through nails. However, using cosmetics for nails has a downside. Since these products are manufactured using chemicals, they may leave a harsh impact on your nails. If you want to know how to keep your nails healthier, you should know what is overlay nails. The following section discusses the importance of nail overlays. What Are Gel Overlay Nails? In simple words, gel overlay is a technique to create a natural-looking finish to the nails. The procedure involves applying gel directly to your nails to add strength. In case your nail is prone to chipping or breaking, you can apply a gel overlay to improve your nail’s strength. At the same time, the gel overlay brings a natural sheen, which makes your nails more attractive. Since overlay nails are clean or transparent, they are also known as transparent gel nail wraps or stickers. Sometimes, professional manicure artists use overlay nails to create a base layer for nail art or polish. You will find different types of overlay nails in the marketplace nowadays. Understanding those types is the first priority for those who want to know more about overlay nails. Types of Overlay Nails As discussed above, you will find different types of overlay nails in the marketplace. Find a guide on those types below before you purchase overlay nails. Why Do You Need Overlay Nails? So, why do the manicure artists consider gel nail overlay wraps? Find answers to this question in the following section. Wrapping up This article has provided a deep insight into overlay nails. Keep in mind that overlay nails do not help your nails grow quicker. However, applying these gel nails can add strength to your existing nails, preventing chipping or brittleness. Another good thing is that overlay nail stickers can enhance the longevity of the existing nail wraps. Nevertheless, it brings a glossy layer over the existing manicure to make it more attractive.

Read More »
Russian Manicure

What Is a Russian Manicure? Decoding the Controversy

Russian manicure is a nail beauty trend that has created some controversies in the last few years. The manicure artists often speak in a hushed tone when it comes to discussing the Russian manicure. Many celebrities have adopted and displayed their passion for this manicure. On the other hand, some celebrities have openly criticized this nail art. The following section of this article will decode the controversies surrounding the Russian manicure. What Is a Russian Manicure? Before delving deeper into the controversies surrounding the Russian manicure, let us first talk more about this manicure technique and procedure. In layman’s terms, a Russian manicure is a dry manicure, which does not require water soaking. You may find various other dry manicure procedures, though this particular dry manicure technique has landed into controversy. Typically, the manicure artists require specialized devices to conduct this manicure procedure. For example, nail artists require nail drills and other equipment to remove excess skin around the nail bed. Reading this will give you an idea of why this manicure procedure is controversial. Besides being controversial, the procedure is complex. So, you need a professional manicure artist to undergo the procedure. The technique was first invented by manicure artists in Russia, and thus it has been named Russian manicure. From Russia, it traveled to neighboring countries such as Kazakhstan, Uzbekistan, Ukraine, etc. The technique became so popular in these countries that Russian manicure has replaced the mainstream or traditional manicure. The Benefits of Russian Manicure One of the major benefits of the Russian manicure is that it is aesthetically pleasing. The procedure removes excess skin to make the nails appear sharper and bolder. Besides enhancing aesthetic appeal, Russian manicure lasts longer than other manicure techniques. So, it is cost-effective to undergo this manicure at a local salon. This manicure is also good for those, who experience slow nail growth. Try the Russian manicure to improve your nail growth in a quick span. What Makes Russian Manicure So Controversial? The Russian manicure is controversial because the technique includes drilling into the nail bed. The drilling has been done to remove gel nail polish wraps. Drilling may cause significant damage to the nails. However, the risk can be minimized if a manicure expert possesses expertise in drilling into the nail bed. The manicure expert also uses an electric file to remove the nail cuticle. Exposing the eponychium to remove the cuticle may attract some bacterial infections to the nails. As a result, a person may sustain long or short-term nail infections and other relevant problems. Bottom Line While discussing what is a Russian manicure, one should discuss both positive and negative aspects. While a Russian manicure renders excellent nail aesthetics, it also carries the risk of nail damage. Choosing a trained and skilled professional is essential in this regard. An untrained manicure professional may cause significant damage to the nails, which cannot be easily treated.

Read More »
Precautionary Measures for Applying Gel Nail Wraps

Precautionary Measures for Applying Gel Nail Wraps: A Comprehensive Guide

In recent years, nail gel wraps have gained immense popularity among beauty enthusiasts for their convenience, durability, and versatility. These innovative nail enhancements offer a quick and easy way to achieve salon-quality manicures at home. However, like any beauty procedure, proper application is key to ensuring the best results and maintaining the health of your nails. In this article, we’ll discuss essential precautionary measures to adopt while applying nail gel wraps, helping you achieve flawless nails while safeguarding their integrity. 1. Prepare Your Nails Before applying gel wraps, it’s crucial to properly prepare your nails. Start by gently filing the surface of your nails to create a smooth and even base. Push back your cuticles using a cuticle pusher or wooden stick to prevent them from interfering with the application process. 2. Clean and Sanitize Cleanliness is paramount when it comes to nail care. Thoroughly clean your nails with a gentle nail polish remover to remove any dirt, oil, or residue. Sanitize your nails and surrounding skin to eliminate bacteria and reduce the risk of infection. 3. Choose Quality Products Invest in high-quality nail gel wraps from reputable brands. Cheap or counterfeit products may contain harmful chemicals and inferior materials that can damage your nails and compromise the longevity of your manicure. Choose the trusted brands known for their safe and effective nail care solutions. 4. Follow Instructions Carefully Each nail gel wrap product comes with specific instructions for application. Take the time to read and understand the guidelines provided by the manufacturer. Follow the recommended steps diligently to ensure proper adhesion and optimal results. 5. Avoid Overlapping When applying gel wraps, avoid overlapping them on your nails. Overlapping can create uneven surfaces and lead to premature lifting or peeling. Trim the wraps to fit the size and shape of your nails precisely, ensuring a seamless and professional-looking finish. 6. Apply Even Pressure Use gentle and consistent pressure when smoothing the gel wraps onto your nails. Avoid pressing too hard, as this can cause wrinkles or air bubbles to form, compromising the integrity of your manicure. Take your time to ensure thorough application and a smooth, wrinkle-free finish. 7. Seal and Cure Properly Once the gel wraps are applied, seal the edges by gently pressing them down with a cuticle pusher or orangewood stick. Follow the manufacturer’s instructions for curing the wraps using a UV or LED lamp. Proper curing is essential for activating the adhesive and ensuring long-lasting wear. 8. Moisturize and Protect After applying gel wraps, moisturize your nails and cuticles regularly to keep them hydrated and healthy. Avoid exposing your nails to harsh chemicals or excessive moisture, as this can weaken the adhesive bond and cause premature lifting. Consider wearing gloves when performing household chores or engaging in activities that may compromise your manicure. 9. Monitor for Signs of Damage Keep an eye on your gel wraps for any signs of damage or lifting. If you notice any lifting or peeling, gently remove the affected wrap and reapply as needed. Promptly address any issues to prevent further damage and maintain the integrity of your manicure. By following these precautionary measures, you can achieve stunning results with gel nail wraps while safeguarding the health and beauty of your nails. With proper care and attention to detail, you can enjoy long-lasting and flawless manicures that make a lasting impression.

Read More »